> For the complete documentation index, see [llms.txt](https://en.docs.monaca.io/llms.txt). Markdown versions of documentation pages are available by appending `.md` to page URLs; this page is available as [Markdown](https://en.docs.monaca.io/products_guide/monaca_ide/build/ios/build_ios.md).
# Building an iOS App
{% hint style="info" %}
Starting from April 2026, all iOS apps submitted to the App Store will need to be built with the iOS 26 SDK or later. For more information, see [Submitting iOS Apps to the App Store ](https://developer.apple.com/ios/submit/). Because of this, in order to publish Monaca apps to the App Store, you must use Cordova 13.0 or higher in your projects.
{% endhint %}
## Prerequisites
Before getting started, you should:
* subscribe to the [Apple Developer Program](https://developer.apple.com/programs/ios/).
* understand the [Types of Build](/products_guide/monaca_ide/build/ios/build_ios.md#types-of-build) and their requirements.
### Types of build
In Monaca, the iOS apps have three types of build: debug, test and release. The differences between these types of build are as follows:
| Type of Build | Description | Requirements | Installation |
| ------------------- | -------------------------------------------------------------- | ---------------------------------------------------------------------------------------------- | ----------------------------------------------------------------------------------------------------------------------------------- |
| **Debug Build** | Building the app for installing on development devices. | - Development Certificate
- Development Provisioning Profile
| |
| **Ad Hoc Build** | Building the app for installing on a limited group of devices. | - Production Certificate
- Distribution (Ad Hoc) Provisioning Profile
| - Apple Configurator 2 (Mac only)
- QR Code
|
| **In-house Build** | Building the app for distribution outside the App Store. | - Production Certificate
- Distribution (In-house) Provisioning Profile
| - Apple Configurator 2 (Mac only)
- QR Code
|
| **Release Build** | Building the app for distribution in App Store. | - Production Certificate
- Distribution (App Store) Provisioning Profile
| |
| **Simulator Build** | Building the app for testing on iOS simulator. | | |
{% hint style="info" %}
Ad hoc distribution is a way to distribute your applications without going through the App Store. Currently, up to **100** applications which are built by using ad hoc provisioning profile can be shared with other iOS devices through ad hoc distribution. However, the application distribution from the developer organization will be limited to the development stakeholders.
{% endhint %}
## Step 1: Configure an iOS app in Monaca
### Configure iOS app settings
1. From the Monaca Cloud IDE menu, go to **Configure → App Settings for iOS**.
2. Fill in the app information:
| Field | Description |
| ---------------- | ----------------------------------------------------------------------------------------------------------------------------------------------------------------------------------------------------------------------------------------------------- |
| Application name | The name representing your app in the App Store |
| App ID | A unique ID representing your app. It is recommended to use reverse-domain style (for example, `mobi.monaca.appname`). Only alphanumeric characters and periods (at least one period must be used) are allowed. |
| Version Number | The number representing the version of your app. It will be required when uploading your application via App Store Connect later (publishing process). It needs 3 numbers separated by dots (for example, 1.10.2). Each number should be in `[0-99]`. |

{% hint style="danger" %}
The app ID (set in the Monaca app settings) cannot contain asterisk (**`*`**) or the build will fail. The App ID must be the same as the explicit app ID you register (or have registered) in Apple Developer Program. Read more on [Register App ID](/products_guide/monaca_ide/build/ios/build_ios.md#register-app-id).
{% endhint %}
3\. After finishing the configurations, click **Save**.
{% hint style="info" %}
Currently, when you update either iOS’s App ID or Android’s package name, both of them will change. In other words, they are configured to be the same. However, it is possible to make them different. Please refer to [Can the iOS' App ID and Android's package name be different?](/faq/application.md#can-the-ios-app-id-and-androids-package-name-be-different).
{% endhint %}
### Configure iOS build settings
1. From the Monaca Cloud IDE menu, go to **Configure → iOS Build Settings** .

2\. Create a new private key or import an existing one. To create a new private key, click the **Generate Key and CSR** button and fill in the username (a name representing this new private key), email address (Apple ID) and your country.

{% hint style="info" %}
If you import an existing private key, you will also need to upload the certificate associated with this private key to Monaca. Please refer to [Import private key and certificate into Monaca](/products_guide/monaca_ide/build/ios/import_export.md#step-2-import-a-private-key-and-a-certificate-to-monaca).
{% endhint %}
3\. After creating a new private key, a CRS file associated with the private key is also created. Download the CRS file by clicking the **Export** button. It will be used to issue the certificates later in the Apple Developer Program.
4\. [Issue certificates in Apple Developer Program](/products_guide/monaca_ide/build/ios/build_ios.md#generate-a-certificate) and download them.
5\. [Create provisioning profiles in Apple Developer Program](/products_guide/monaca_ide/build/ios/build_ios.md#create-a-provisioning-profile) and download them.
6\. Upload the certificates and corresponding provisioning profiles to the Monaca Cloud.
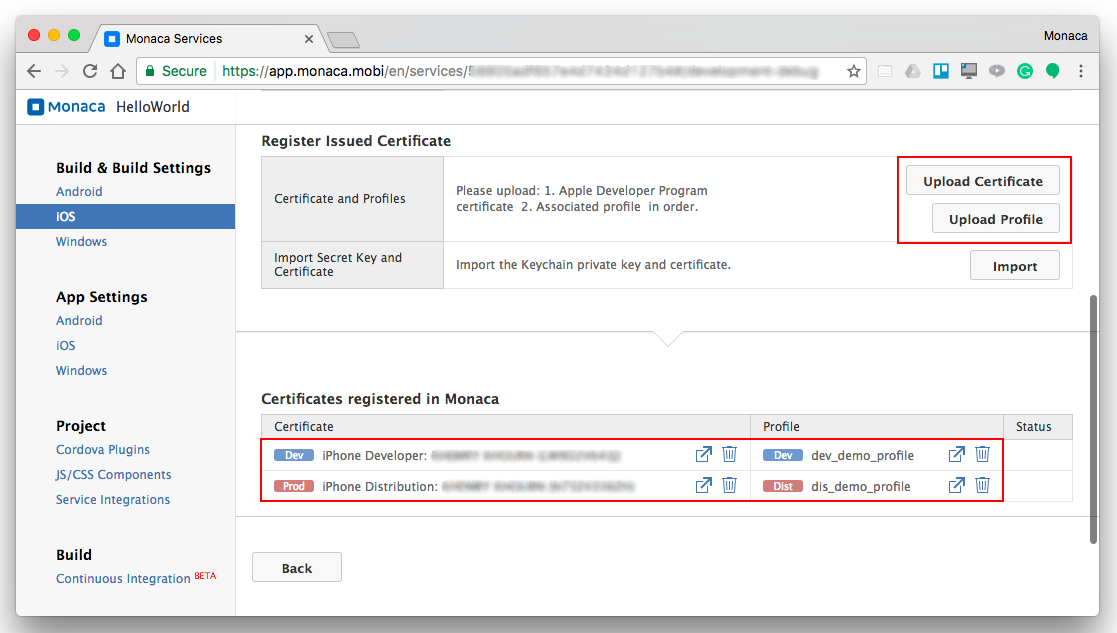
{% hint style="info" %}
You can upload multiple certificates and multiple corresponding provisioning profiles with the Monaca build interface.
{% endhint %}
## Step 2: Configure iOS app in Apple Developer Program
1. From [Apple Developer page](https://developer.apple.com/), go to `Account`.
2. Sign in using the Apple ID and password you used to enroll in the Apple Developer Program. If you haven’t enrolled in the program yet, please subscribe [here](https://developer.apple.com/programs/).
3. Go to `Certificates, Identifiers & Profiles`. The following page will open:

4\. On this page, we are going to do 4 important things:
* [Generate a certificate](/products_guide/monaca_ide/build/ios/build_ios.md#generate-a-certificate)
* [Register an App ID](/products_guide/monaca_ide/build/ios/build_ios.md#register-an-app-id)
* [Register a development device](/products_guide/monaca_ide/build/ios/build_ios.md#register-a-development-device)
* [Create a provisioning profile](/products_guide/monaca_ide/build/ios/build_ios.md#create-a-provisioning-profile)
### Generate a certificate
There are two types of certificates that can be issued in the Apple Developer Program:
* Development: required for a debug build
* Production: required for either an Ad hoc or a release build
After downloading the CSR file (refer to [Configure iOS build settings](/products_guide/monaca_ide/build/ios/build_ios.md#configure-ios-build-settings)), you can issue and download certificates in the Apple Developer Program.
In the following example, we will show you how to issue and download a development certificate:
1. Select the `Certificates` item.
2. Click the :heavy\_plus\_sign: button:

3\. Choose **iOS App Development** and click **Continue**.
{% hint style="info" %}
Choose **App Store** and **Ad hoc** if you want to issue a production certificate.
{% endhint %}
4\. Click **Continue** again and upload the CSR file that you’ve downloaded from Monaca Cloud IDE earlier. Then, click **Generate**.
5\. Now, your development certificate has been issued. Download it as you will need to upload it to the Monaca Cloud IDE later.
{% hint style="info" %}
Follow the same instructions in order to create a production certificate.
{% endhint %}
### Register an App ID
1. Select the `Identifiers` item.
2. Click the :heavy\_plus\_sign: button:

3\. The App ID string contains two parts (prefix and suffix) separated by a period. Fill in the information of your App ID:
* `App ID Description`: Description of your App ID. You cannot use special characters such as `@`, `&`, `*`, `'` or `"`.
* `App ID Prefix`: It is defined as your Team ID by default.
* `App ID Suffix`: It is defined as a Bundle ID search string. There are two types of App ID Suffixes:
| Suffix | Description |
| --------------- | --------------------------------------------------------------------------------------------------------------------------------------------------------------------------------------------------------------------------------------------------------------------------------------------------------------------------------------------------------------------------------------------------------------------------------------------------------------------------------------------------- |
| Explicit App ID | Register an explicit App ID if you plan to incorporate app services such as a Game Center, In-App Purchase, Data Protection, and iCloud, or just want a provisioning profile for a single app. Enter a unique string in the Bundle ID field of Explicit App ID which should match with the Bundle ID of your app. The App ID must match the one you set in Monaca Cloud IDE as shown in [Configure iOS App Settings](/products_guide/monaca_ide/build/ios/build_ios.md#configure-ios-app-settings). |
| Wildcard App ID | Register a wildcard App ID if you want to use a single App ID for building and installing multiple applications. Enter an asterisk (`*`) as the last digit in the Bundle ID field of wildcard App ID. |
* `App Services`: Select the services you want to enable in your app.
4\. Then, click **Continue**. After reviewing your App ID’s info, click **Submit**. Now you have completed your App ID registration to the Apple Developer Program.
### Register a development device
You are required to register your development device before creating a development or a distribution provisioning profile.
In order to register a device that you will be using during your app development, please follow the instructions below:
1. Select the `Devices` item.
2. Click the :heavy\_plus\_sign: button:

3\. Fill in the information of your device.
* `Name`: a name representing your device (Example: MyiPhone)
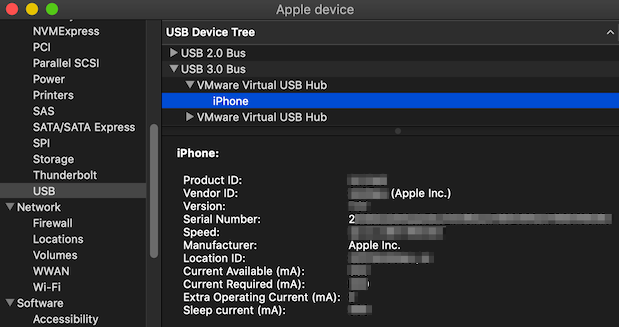
* `UDID`: the unique device identifier of your device. You can find this identifier by connecting your iOS device to your computer. For macOS, you can check it from the `serial number` of the system information. For Windows, you can check it from the `device instance path` of Device Manager.

4\. Then, press **Continue**. After reviewing your device’s info, click **Register**. Now you have completed your device registration into Apple Developer Program.
### Create a provisioning profile
One last step before building your iOS app is creating a provisioning profile. There are two types of provisioning profiles:
* Development: used with a development certificate for a debug build
* Distribution: used with a production certificate for Ad hoc and
release builds
In the following example, we will show you how to create a development provisioning profile:
1. Select the `Profiles` item.
2. Click the :heavy\_plus\_sign: button.

3\. Choose `iOS App Development` and click **Continue**.
{% hint style="info" %}
* Choose `Ad hoc` if you want to create a distribution provisioning profile for an Ad hoc build.
* Choose `App Store` if you want to create a distribution provisioning profile for a release build.
{% endhint %}
4\. Select your App ID and click **Continue**.
5\. Select the certificate(s) you want to include in this profile and click **Continue**.
6\. Select the device you have previously registered for development and click **Continue**.
7\. Input a name for the provisioning profile and click **Generate**.
8\. Now your development provisioning profile is ready. Download it as you will need it when building your iOS app in Monaca later.
{% hint style="info" %}
Follow the same instructions in order to create a distribution provisioning profile.
{% endhint %}
## Step 3: Build an app
1. From the Monaca Cloud IDE menu, go to **Build → Build App for iOS** .
2. Select the type of build you want and click **Start Build**.

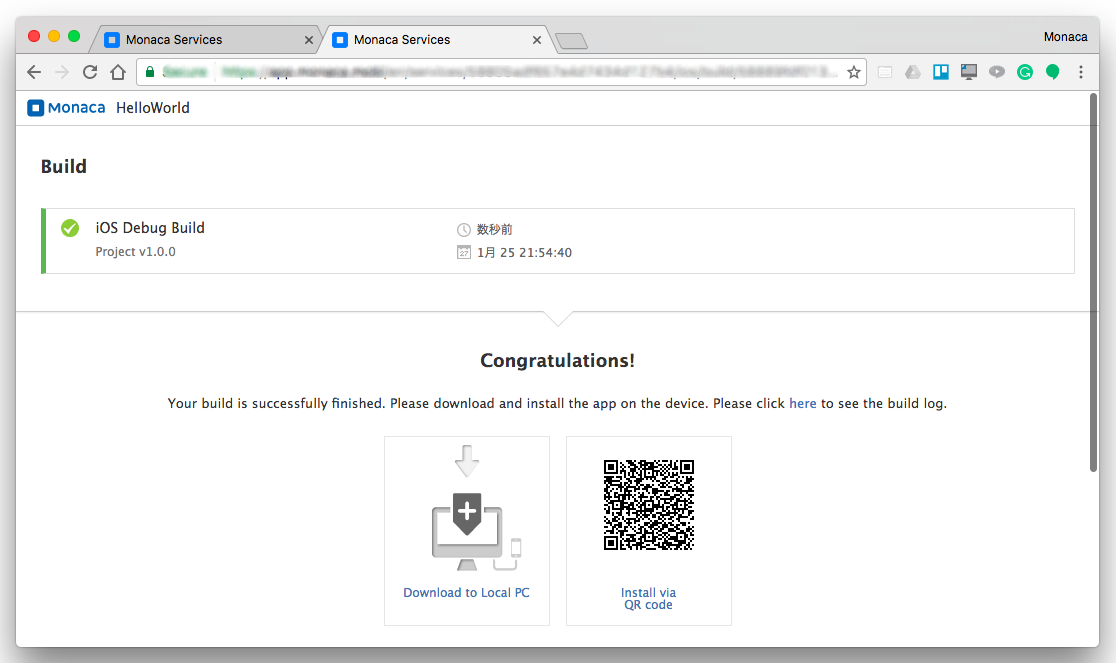
3\. It may take several minutes for the build to complete. Once the build is completed, your built app is ready to be installed/downloaded. See the below screenshot as an example:
{% hint style="info" %}
If you are using a simulator with macOS Catalina 10.15 or later, you need to run the following command in the terminal before running the app. It enables all the applications.
`sudo spctl --master-disable` \
\
To restore the setting, run the following command:
`sudo spctl --master-enable`
{% endhint %}
See Also:
* [Building for Android](/products_guide/monaca_ide/build/build_android.md)
* [Building for Windows](/products_guide/monaca_ide/build/build_winrt.md)
* [App Store Distribution](/products_guide/monaca_ide/deploy/appstore.md)
* [Build History](/products_guide/monaca_ide/build/build_history.md)