
Building for Windows
Windows builds of Cordova 9.0 or higher are supported by electron apps. See here for building an electron app on Windows. Windows builds are available for Cordova 7.1 projects.
Windows Store apps
Windows Store apps are created by using HTML5 and JavaScript, and they run natively on the WinRT architecture. Therefore, applications created by using Monaca are equipped with the same functionalities as the ones created by development tools such as Visual Studio and can use all native features including WinJS.
Windows Store apps run on PCs and tablets installed with Windows and Windows RT. However, if you want to publish an app to the Windows Store, you will need to rebuild it separately by using Visual Studio or other development tools since the release build from Monaca is not supported yet.
On the other hand, Windows Store apps have some constraints that are not found on Android or iOS such as:
There are some methods or features that are not supported since
HTML5 and JavaScript run in the Trident/Chakra application mode. For
more details, please refer to HTML, CSS, and JavaScript features and
Prerequisite
You are required to have a valid Microsoft Developer License in order to build Windows apps. It's free but you need to have a Microsoft account. If you don't have a license, please register here.
Step 1: Configure the app settings
From the Monaca Cloud IDE menu, go to Configure → App Settings for Windows.
Fill in the app information:
Field
Description
Package Certificate Key
This certificate is used when Monaca compiles a Windows app. It will also be used when doing sideloading or submitting to the Windows Store. It will be generated automatically in the first Windows build if it does not yet exist. If you want to upload an existing certificate file, it should be in the
PKCS#7format without password.App Display Name
The application name. It will appear on the start screen.
Package Display Name
The package name.
Short Name
The name to be displayed on the taskbar.
Show Name
Define the default setting of the logo displayed in the start menu of Windows 8 or higher.
Version
The version number of your app. A version number consist of numbers separated by dots (for example,
0.0.1.0).App Description
A short summary of your app.
Package Publisher Name
Your name, group name, company name, etc.
Architecture
Select a CPU Architecture. Available options are
AnyCPU,x86,x64andArm.

3. After setting the configurations, click Save.
Step 2: Build the app
From the Monaca Cloud IDE menu, go to Build → Build App for Windows.
Click Start Build.

3. After the build is completed, download the zip file of the built app.
Step 3: Install the app
Extract the downloaded zip file.
In the extracted folder, right-click on the Add-AppDevPackage.ps1 file and click Run with PowerShell. The installation will begin.

3. You might be asked to confirm the opening of the selected file. Click Open.

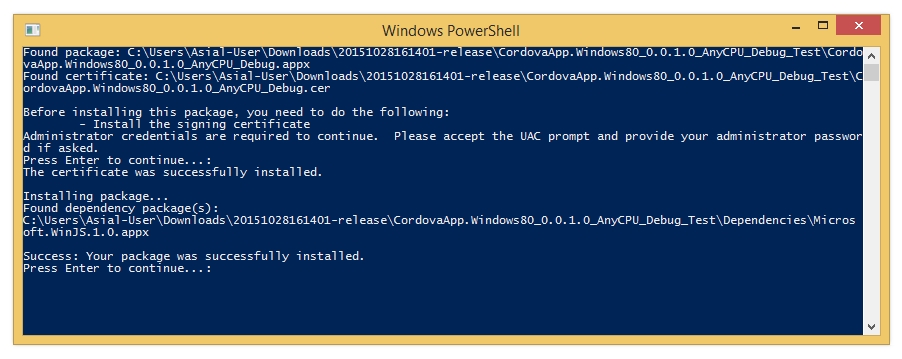
4. Press Enter to continue.

5. The UAC (User Account Control) prompt will appear asking you to grant the Administrative privilege. Click Yes.
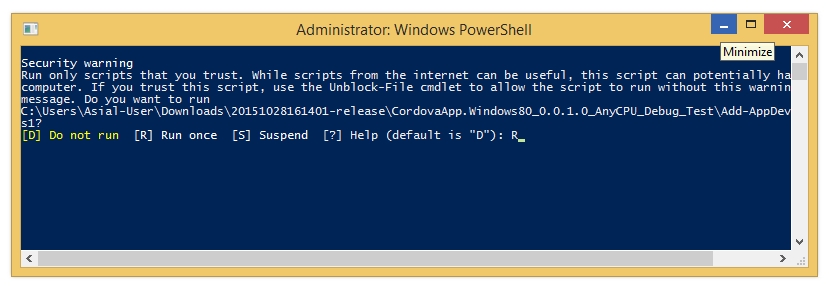
6. Confirm the running of the app by typing R in the PowerShell windows.
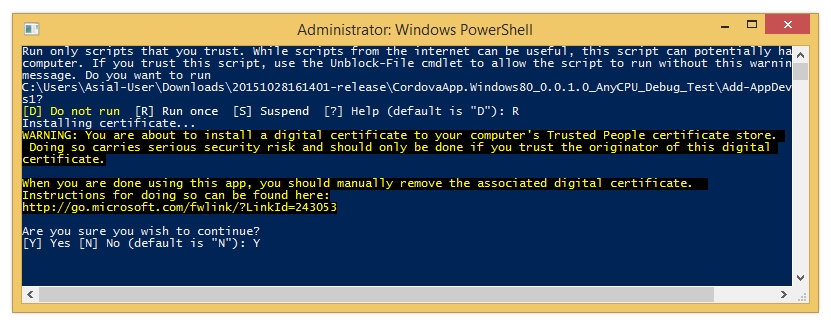
7. Then, type Y.
8. Once the installation is completed, press Enter.
9. Now, your app should be installed. You can find your app in the Apps.
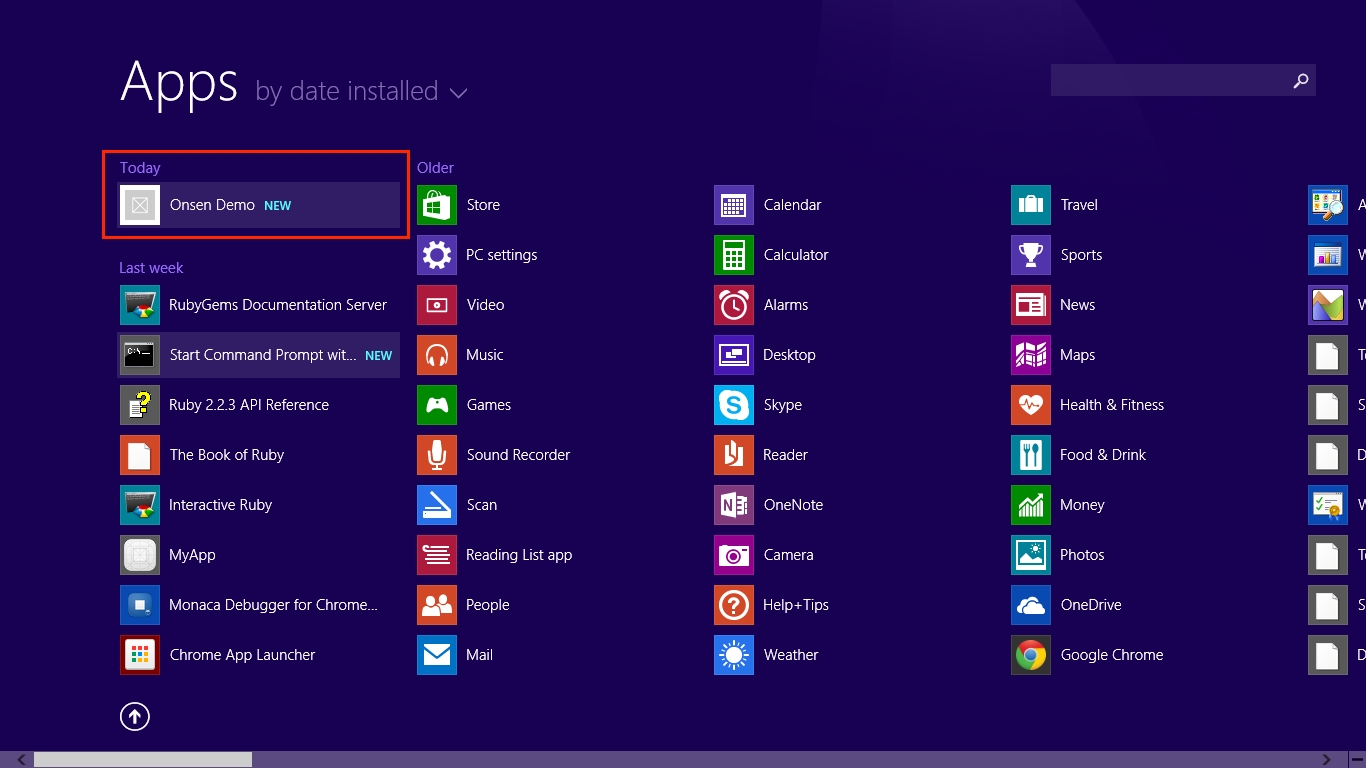
10. Click on it to launch the app. Then, your app should be running.
See Also:
Last updated
Was this helpful?